
I made my first slants today, four WLP001. I'll post up some pictures shortly...

 1 votes
yeast recycling
Started by
3rd party JKor
, Apr 20 2009 09:31 PM
41 replies to this topic
#41

3rd party JKor
-

- Patron
-

- 64157 posts
Puller of Meats
- LocationNW of Boston
Posted 17 May 2009 - 02:07 PM
#42
3rd party JKor
-
- Patron
-
- 64157 posts
Puller of Meats
- LocationNW of Boston
Posted 17 May 2009 - 03:51 PM
Here's the materials for making the malt agar. I made 200mL. It was a lot more than I needed since I was only making 10 slants (which turned out to be 9, because I forgot to fill one). But working with less than 200mL would have been a little tough and my measurement equipment was barely enough to do this amount. The agar is really where you need the measurement precision. My scale only reads in numerals for the gram scale, so it's kinda tought to measure out 1.5g of agar (per 100mL). I decides to measure out 4g of agar, according to my scale, because I fgured it would be tween 3.5 and 4 grams, depending how the scale rounds off the weight. It was probabyl a little more than the ideal amount of agar but it seemed to work out OK. I used 20g of DME and a dash of yeast nutrient. The tubes are screw-top 16x125mm and there's a disposable syringe in the white packaging. I used my backpacking stove and titanium pot to cook up the mixture, since it's easier to handle small volumes with that equipment...and it may spur the next great brew equipment debate: Stainless vs. Titanium!!!
 I put the filled tubes into a preheated pressure canner with a few flasks for starters.
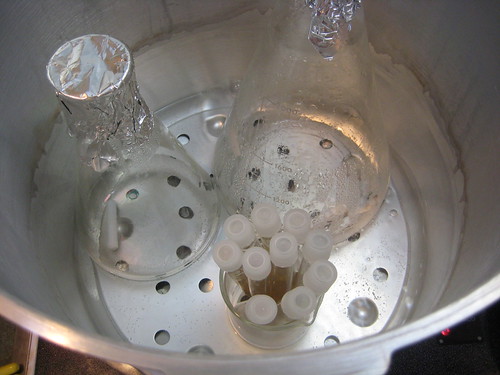 Go to 15psi for 30mins.
 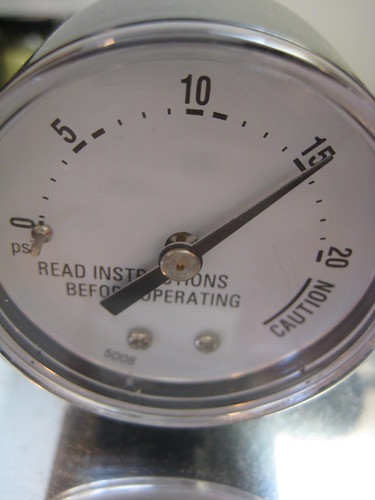 I had some excess malt agar left over after filling the tubes, so I poured it into a little cup. It set up pretty quick, only a few minutes. This is after a broke it out of the mold and cut it in half. If you look closely you can see some light strips, which are undissolved agar. I probably could've done a better job mixing in the agar, but the pressure cooking seemed to dissolve anything what hadn't already been dissolved in the tubes.
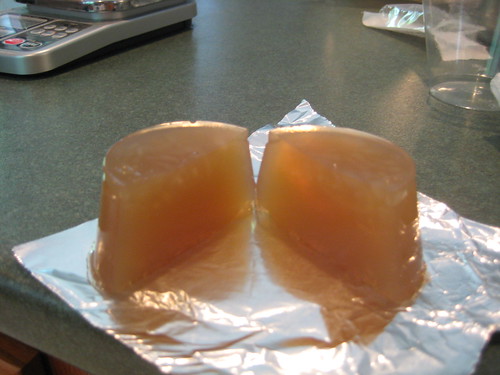 Here are the tubes cooling after coming out of the pressure canner. They're leaning on a pencil to get the proper angle.
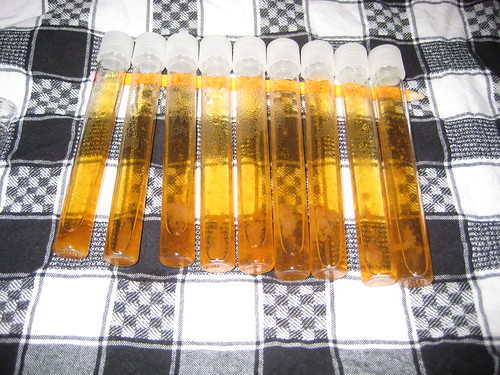 After they cooled off I set up my inoculating work area.
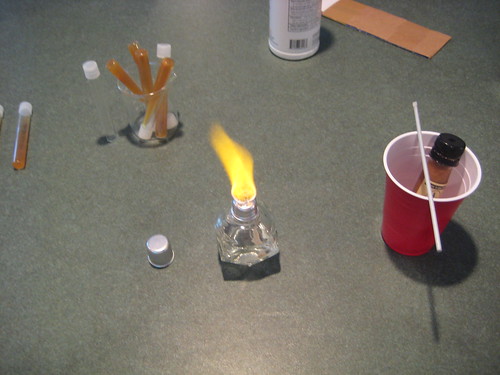 Here's the post inoculation tubes. The inoculation process went OK. I just shook up the White Labs vial to get the yeast in suspension, and stuck the hot loop right in. Whatever came out went into the slant. Of course it will be tough to tell if everything went fine until the slants actually start growing. On two of the four slants I ended up touching the side of the tube with the loop, which is supposedly bad. We'll see what happens.
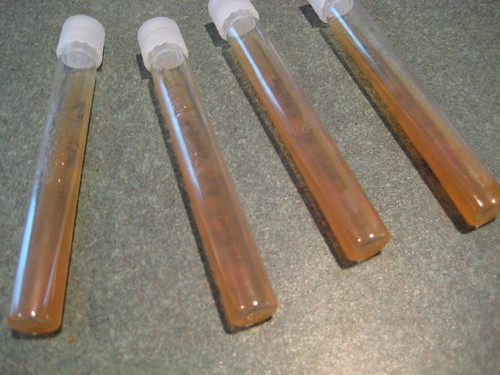 You can't see much here yet, but I'll post some pics up when they start growing.The process itself was pretty easy. There were a few hiccups, but I see this as something that will be very quick and easy after doing it a few times.
I used my backpacking stove and titanium pot to cook up the mixture, since it's easier to handle small volumes with that equipment...and it may spur the next great brew equipment debate: Stainless vs. Titanium!!!I put the filled tubes into a preheated pressure canner with a few flasks for starters.Go to 15psi for 30mins. I had some excess malt agar left over after filling the tubes, so I poured it into a little cup. It set up pretty quick, only a few minutes. This is after a broke it out of the mold and cut it in half. If you look closely you can see some light strips, which are undissolved agar. I probably could've done a better job mixing in the agar, but the pressure cooking seemed to dissolve anything what hadn't already been dissolved in the tubes.Here are the tubes cooling after coming out of the pressure canner. They're leaning on a pencil to get the proper angle.After they cooled off I set up my inoculating work area.Here's the post inoculation tubes. The inoculation process went OK. I just shook up the White Labs vial to get the yeast in suspension, and stuck the hot loop right in. Whatever came out went into the slant. Of course it will be tough to tell if everything went fine until the slants actually start growing. On two of the four slants I ended up touching the side of the tube with the loop, which is supposedly bad. We'll see what happens.You can't see much here yet, but I'll post some pics up when they start growing.The process itself was pretty easy. There were a few hiccups, but I see this as something that will be very quick and easy after doing it a few times.
1 user(s) are reading this topic
0 members, 1 guests, 0 anonymous users

